The Media Library contains all the images and PDF files on the site (and other media content like music files or videos, if we had any). All this content is in one place, and not organized into folders or similar structures. It’s a big amalgam of everything. Since we have a great many images on the site, this could be completely unmanageable.
Fortunately, there is a good search function which makes things easier.
The Media Library is accessed in a number of ways, depending on the context. There are two main ways you will use as an Editor. The first is working directly in the Media Library, the second is accessing the Media Library through the “Set Featured Image” function.
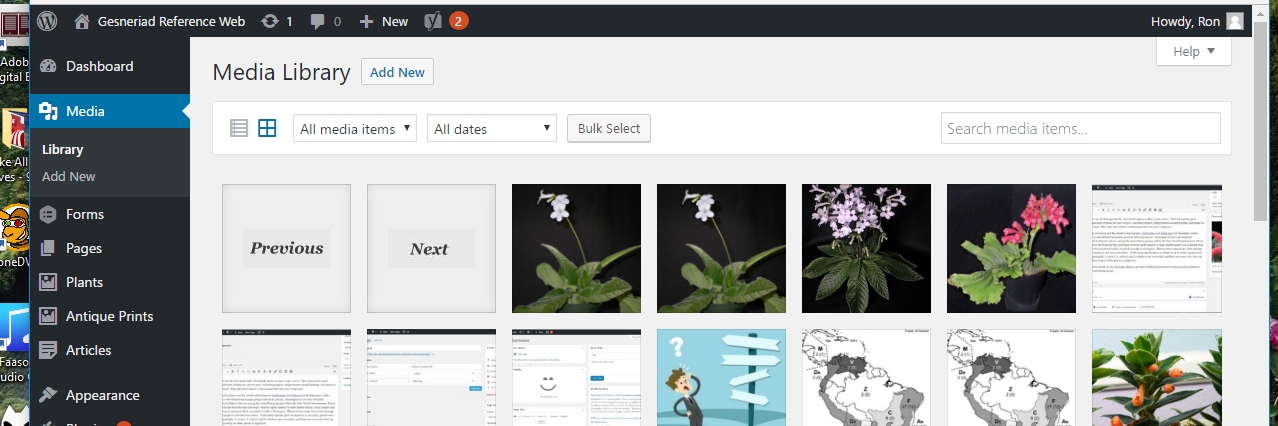
While in Dashboard mode, you can click on “Media” to the upper left of the screen in order to see the media library. From there, you can add or delete items and edit them in various ways.

While in page editing mode (editing a genus page, or a plant page), you can add or change the “Featured Image” (at lower right above). In genus pages (such as in this view of an old and now replaced Achimenes page), the featured image is the thumbnail that is displayed on the particular genus page itself, and in the list of genera. In plant pages, the featured image is the main image displayed on the page, and also the thumbnail for the image on that genus page’s species/hybrid/intergneric lists. If there is already a Featured Image, you can edit it by clicking on the image, and remove it by clicking “Remove Featured Image”.

If you remove it, or there wasn’t one in the first place, you can set a new one by clicking on “Set Featured Image”. As part of that process you can upload an additional picture to use as the Featured Image.
You need to edit the image appearance and size prior to uploading to the site, using any of a variety of tools such as Photoshop, Corel, proprietary image editors that come with cameras, etc. Adding captions, specifying title or providing additional image information are aspects of editing that is done within WordPress. Standards for GRW images are summarized below.
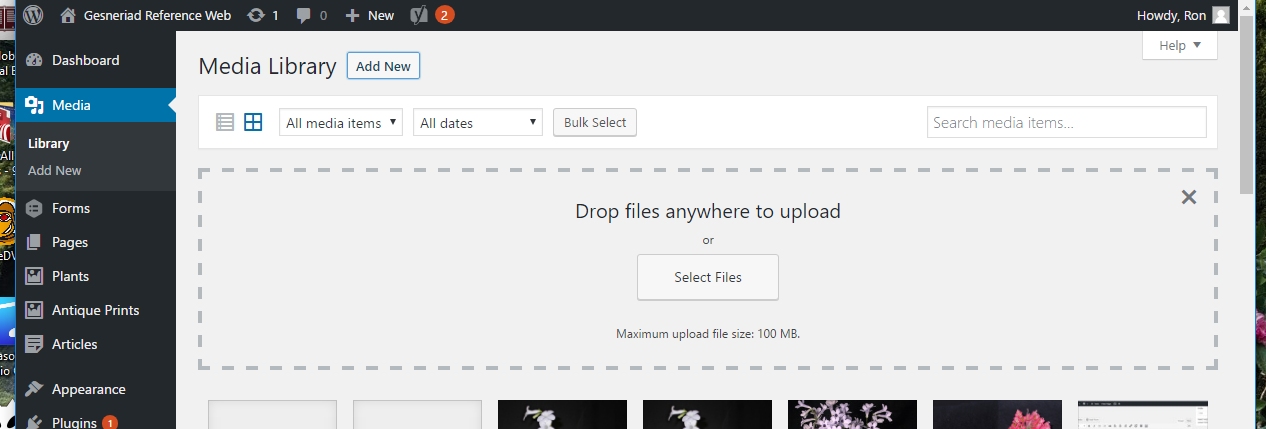
You can upload additional images to the media library, either directly from the Media Library dialogue, or when setting a Featured Image. First, make sure you have saved your edited image(s) to a convenient location on your computer (and remember where that is!). In the Media Library, select “Add New”, and a dialogue for dropping or selecting files appears, as above; in editing mode, select “Set Featured Image”. The illustration above is from the Media Library dialogue, but is similar to that in editing mode. In the latter, you have the option of inserting an image already in the library, or choosing “Upload” to add a new one.
Click “Select Files” to locate and upload the file(s) you have previously saved on your computer. If you are working from the dialogue initiated by “Set Featured Image”, once the image is uploaded it will be selected in the Media Library, and you can proceed with insertion of that image. If you have uploaded an image via the Media Library general dialogue (as in the first example above), the image(s) you’ve uploaded will be available in the Library whenever you choose to access them.
I have found it most convenient to add a file to the Media Library by dragging it from my file location (using Windows Explorer in my case), and dropping it in the open Media Library window; this is fast and efficient.

When in the Media Library you can find an existing image you want to work with or to insert into a page by using the “Search media items” box. Enter the name you want to search for or a fragment of a name, in order to display relevant options. In the screenshot above, I entered “dunnii” in the search box, and the result was an array of images of Streptocarpus dunnii, and nothing else. You can do the same thing from the “Set Featured Image” dialogue when editing a page.
It’s important to note that the search function works ONLY on file names or information entered as caption or information (see below). Many images imported from the old GRW site do not have this information, and file names are just numbers. If there is an image on the site that you want to work with, but you can’t find it using the name of the plant, this is likely the problem. There are ways of identifying the file name — ask an Admin. about how to do this.
When uploading images, make sure that the file name includes the full name of the species or hybrid. It makes searching infinitely easier.
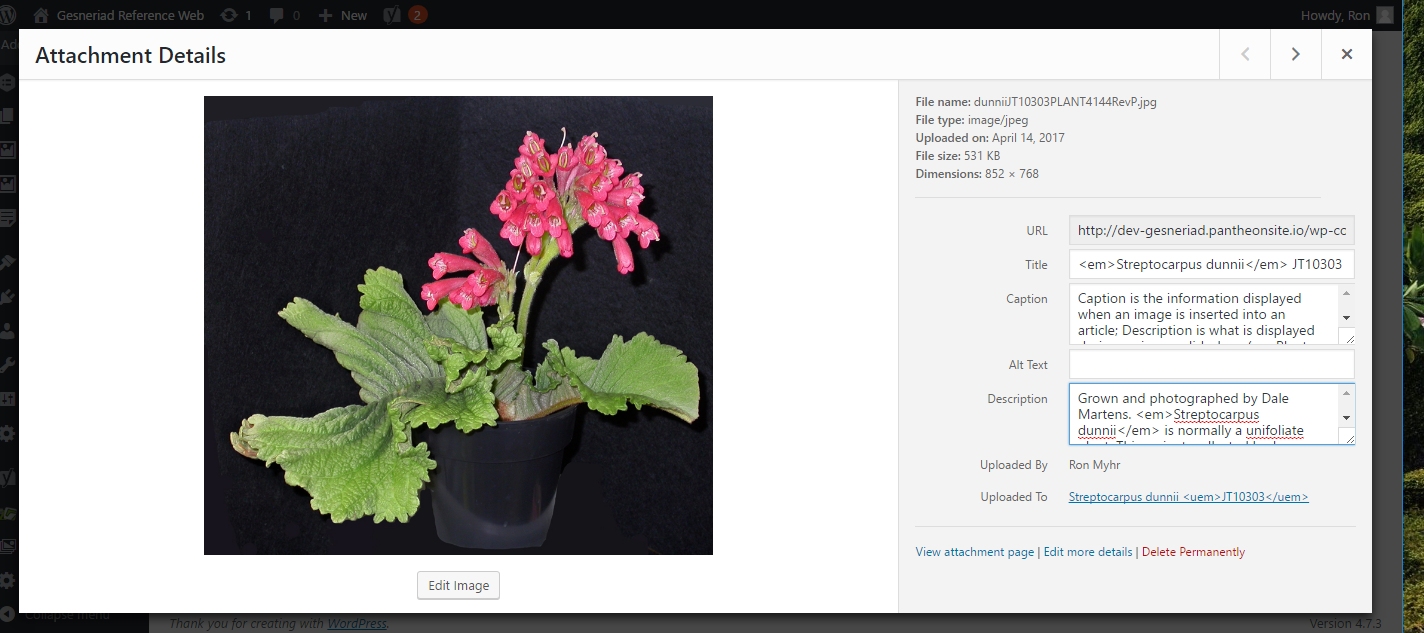
In some cases (e.g. featured images) only the image is displayed on the front end of the site; in other contexts (e.g. articles and slideshows, the latter as discussed in Plant Pages) additional information can be displayed, and should be entered properly. You can enter this information by editing an image; you start by selecting the image (double clicking, highlighting and hitting enter, etc.). Note that in the dialog above, I entered Caption information that is then displayed with the screenshot (inserted as an image) in an article (this page). The Description is not displayed when the image is inserted in an article, but IS displayed with the image when it’s part of a slideshow.
It’s important to note that Caption and Description information can be edited from the media library directly, and also during the process of inserting or linking a picture from a page. Entered information is saved automatically, and no specific “save” or “update” action needs to be taken within the image editor.
Details on use of images is contained in the sections on Plant Pages.
Please note the standards for images used on the GRW:
- Images should be of good quality, in focus, properly lit, etc. They should provide a good illustration — of a plant, a plant part, habitat, etc.
- Images should be about 1500 pixels on their longest side, or perhaps a bit larger. For screen display, anything much bigger (e.g. native camera size) is overkill and a waste of storage space. Small sizes don’t provide adequate detail to make good use of the zoom function. If the only image available is of moderate size e.g. 900 pixels on the longest side, this will still provide adequate detail and is acceptable. Of course, if only a small image is available, it will be better than nothing.